Waitlist
Overview
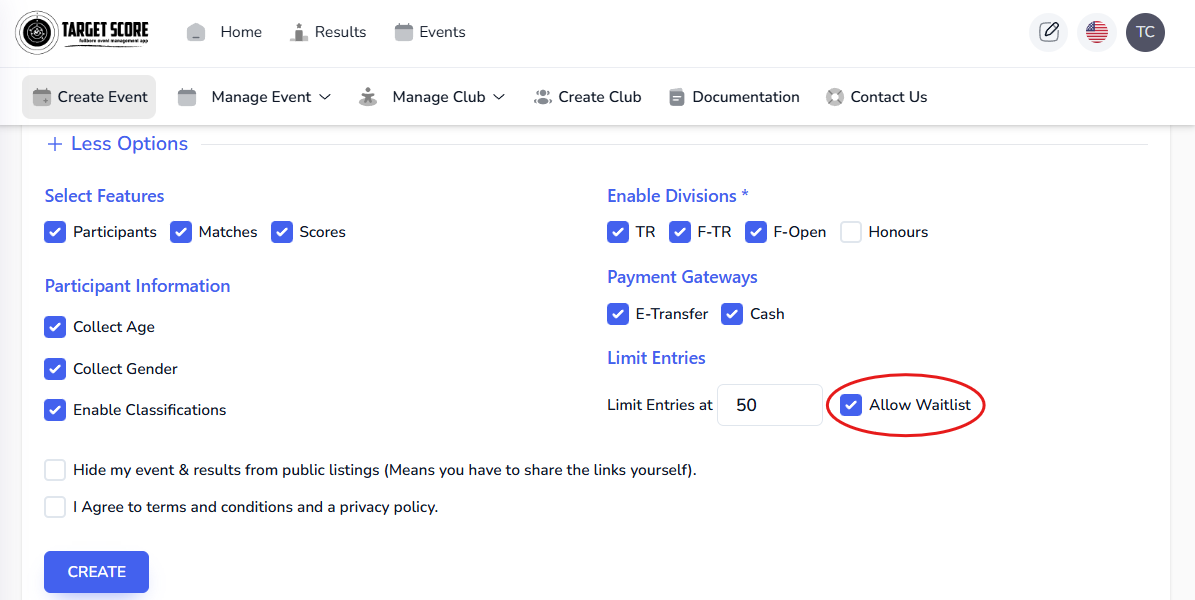
The Waitlist option under the Manage Event menu is available only when the selected event has waitlists enabled. To enable the waitlist, enter a number in the "Limit Entries At" field while creating an event, and then check the "Allow Waitlist" box.
When the number of participants and pending registration requests reaches the limit, registration will close, and a "Join Waitlist" button will appear.
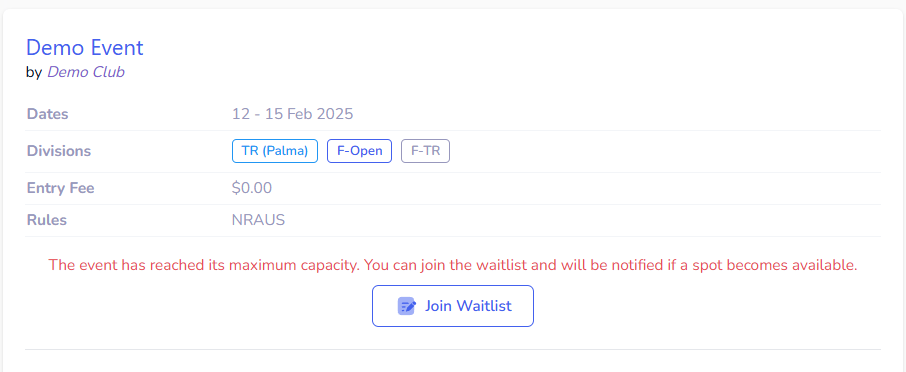
When a user clicks the "Join Waitlist" button, a form similar to the registration form will open, but without the payment option. Entries submitted here will go to the Waitlist section under Manage Event.
Manage Waitlist
View Waitlist
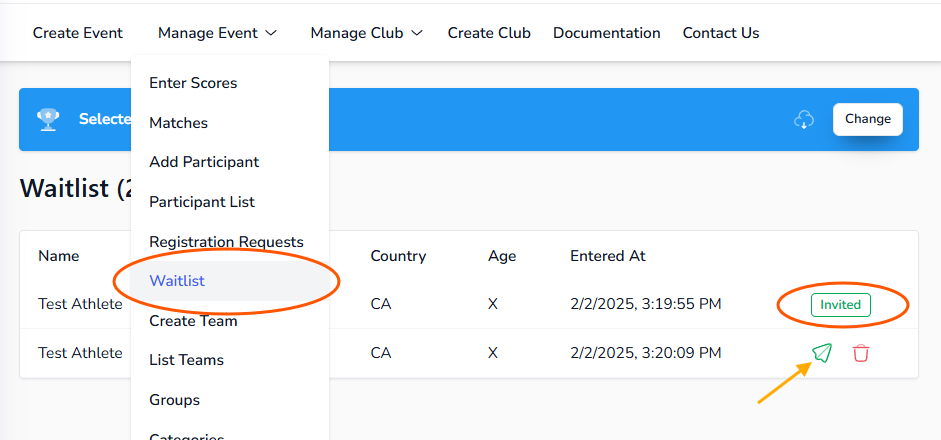
To view the waitlist, click on "Waitlist" under the Manage Event menu. A table will display the participants on the waitlist in the order they joined, with the most recent entry at the top.
Send Invite To Join
If you have space available because someone withdraws, do not remove them from your participant list. If the number of entries falls below the limit, registration will reopen. Instead, either Edit the event and reduce the limit or manage the status of participants.
To send an invite, click on the green paper kite icon. This will send an email to the participant with a unique link to join. The invite is only valid for 72 hours to ensure fairness to other participants.
While their invite is open, their entry will show as "Invited." Once they accept the invite, their entry will move to the Participants List, and their waitlist entry will be removed.
If their invitation expires, their waitlist entry will show as "Expired." You can then send them another invite.
Remove Invite
To remove someone from the waitlist, click on the red bin icon.