Manage Participants List
This section guides you on how to manage participants entries in your event, including editing participant details, exporting participant lists, and handling their status.
Select the Event
Go to Upcoming Events for ongoing event or upcoming events. For past events, go to Past Events.
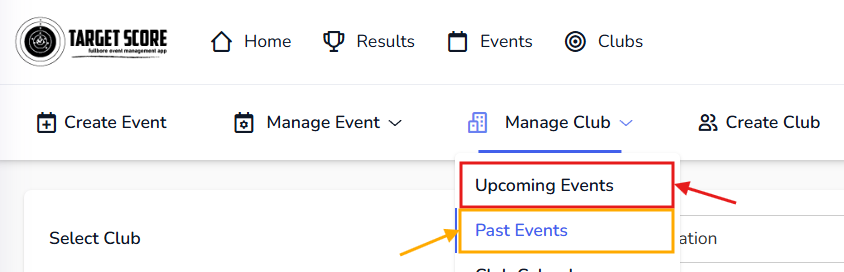
On these pages, click on Entries button on the event you want to manage participants for.

Alternatively, if there is already an active event selected, you can go directly to Manage Participants page by navigating to Manage Event > Manage Participants.
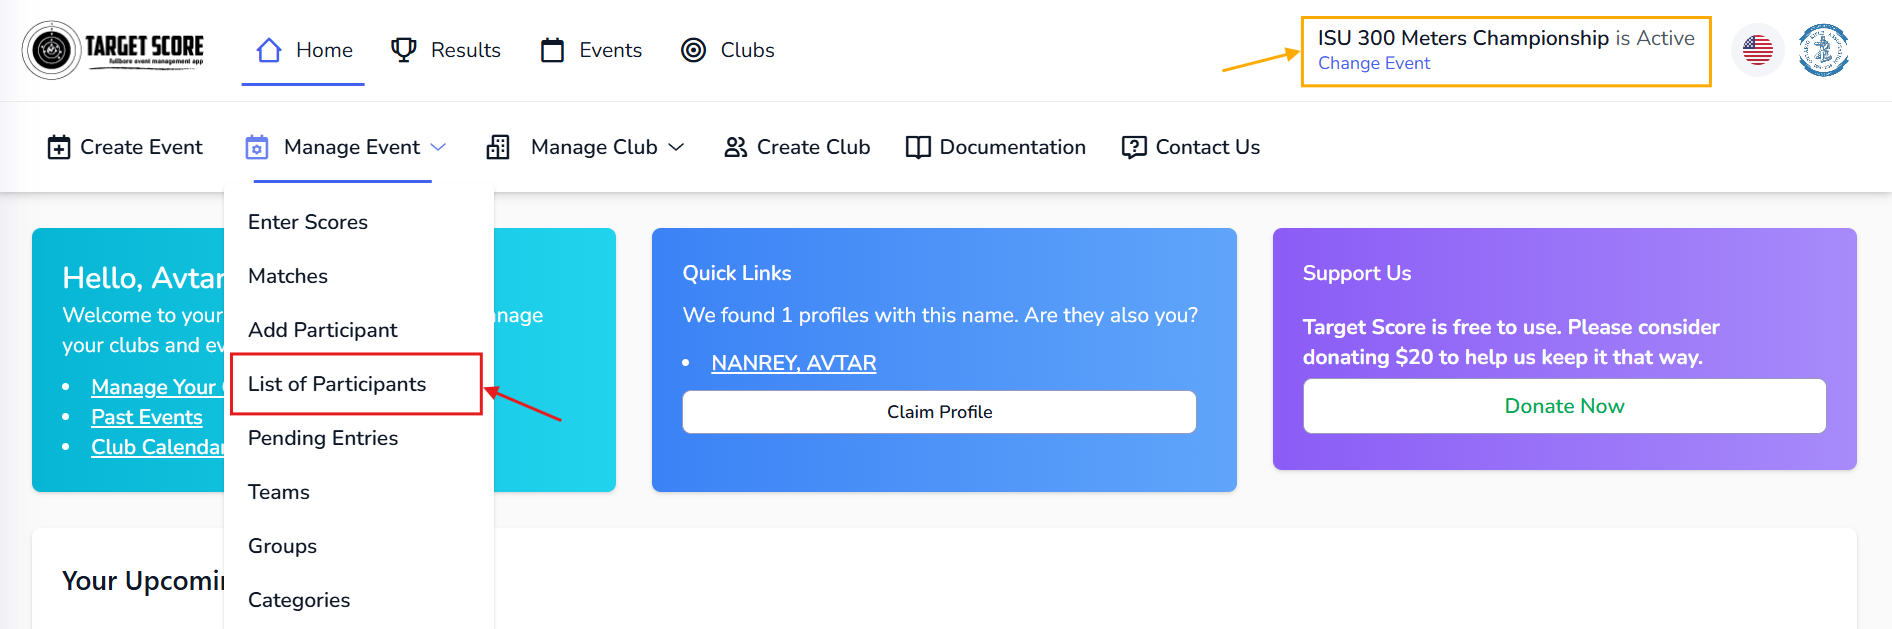
Participant List Options
On the Manage Participants page, you will see a list of all participants registered for the selected event. Here are some options available to manage the participants:
Summary
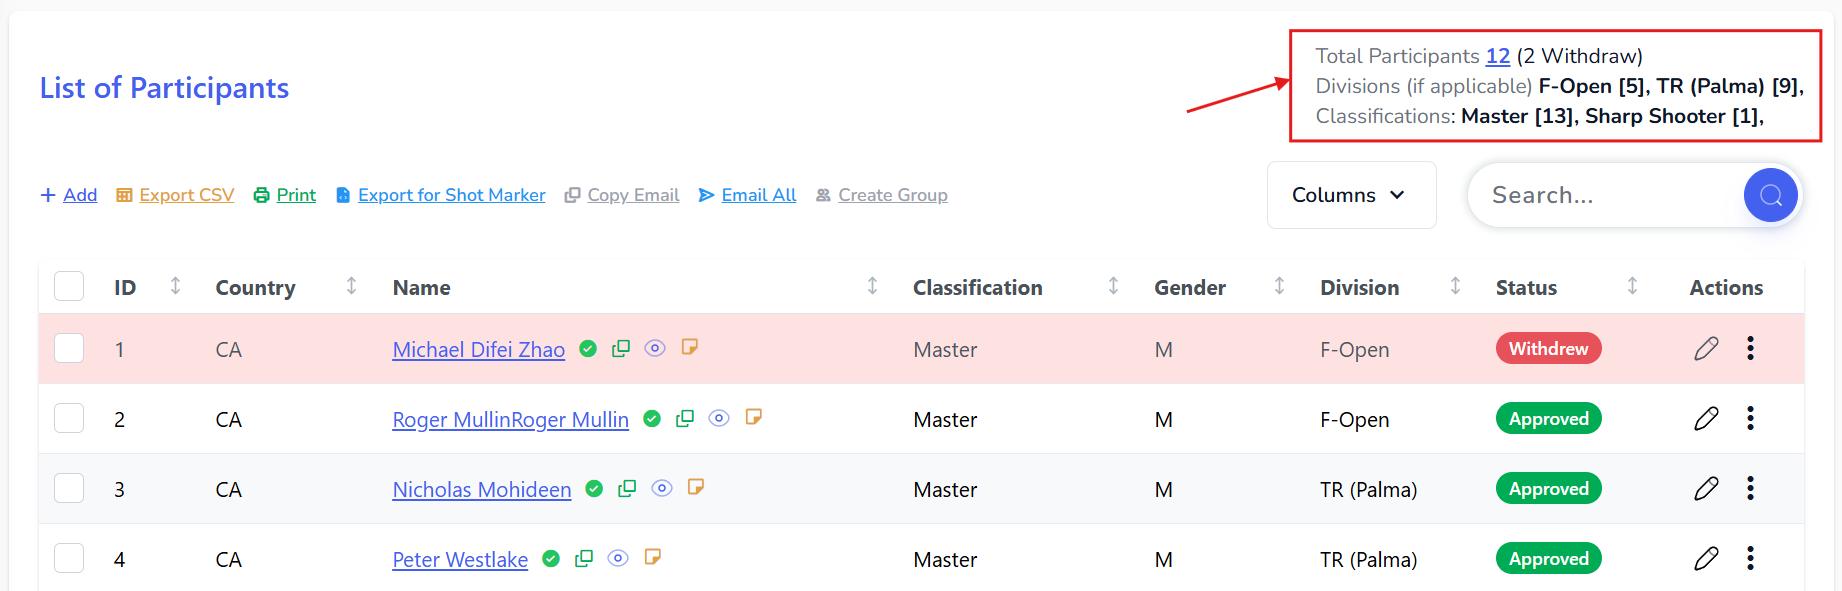 This section provides a quick overview of the total number of participants, their division and classification, and other relevant statistics.
Add Participant
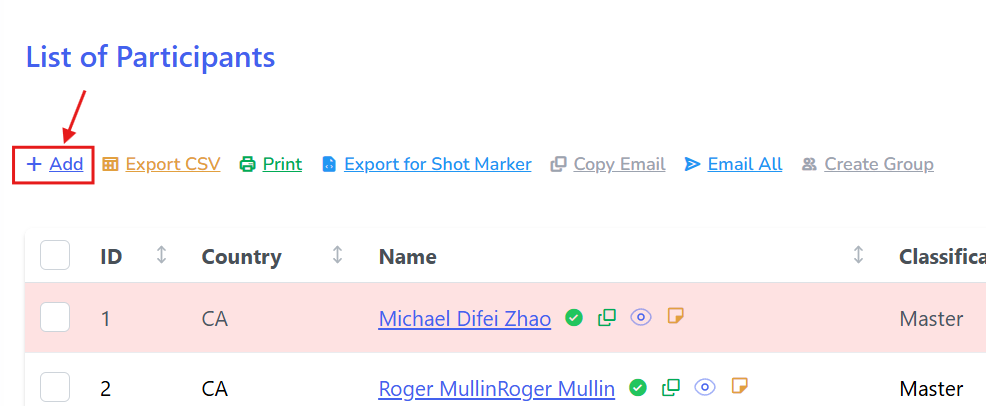 Click this button to manually add a new participant to the event. This is useful for walk-ins or last-minute registrations. For detailed steps, refer to the Add Participant guide.
Export List to CSV
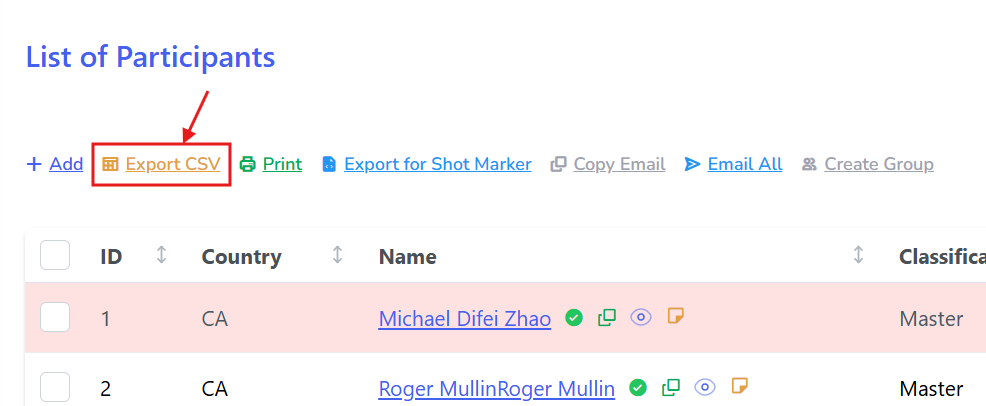 Click this button to export the entire participant list to a CSV/Excel file. This is useful for offline record-keeping or sharing with other event organizers.
Print List
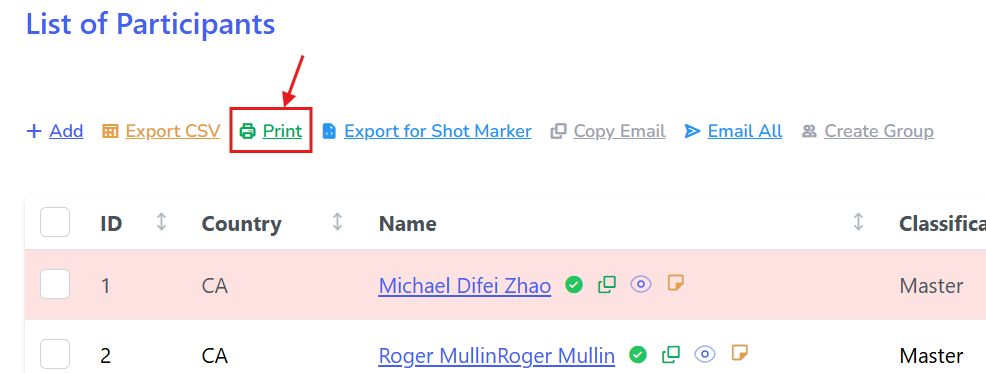 Click this button to print the current participant list. This is useful for having a physical copy of the list for check-in or other purposes.
Export for Shot Marker
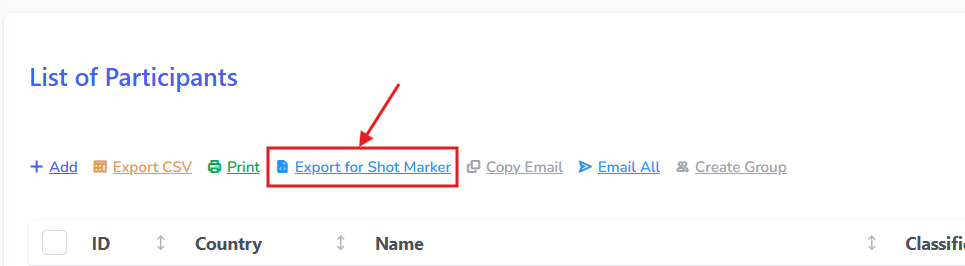 Click this button to export the participant list in a format compatible with Shot Marker. For more details, refer to the Export to Shot Marker guide.
Copy Emails
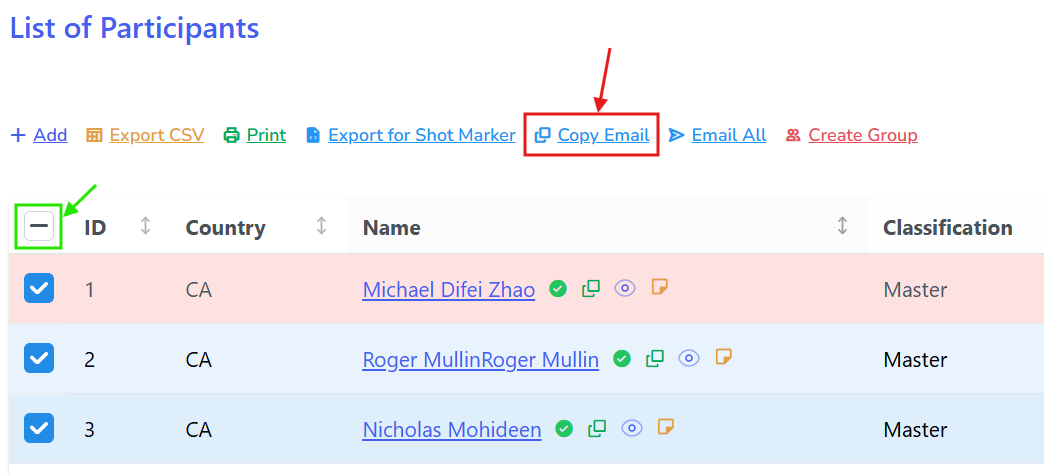 First you need to select the Participants. Then click this button to copy the email addresses of the selected participants to your clipboard. This is useful for sending bulk emails or notifications to participants.
You can select all participants by clicking the checkbox at the top of the list.
Email All
Click this button to write one email and send it to every participant of the event. Participants who withdrew, were cancelled, rejected or refunded are left out, and each person receives the email once even if they have several entries.
- Reply-to is where participants' replies go. It starts as the event's contact email and you can change it.
- Attachments: up to 3 files (PDF, DOC or DOCX, 3 MB each). Participants receive download links that work for 7 days.
- After sending, the status page shows how many emails were sent, skipped or failed. View sent emails lists every email sent for the event.
Save a draft
Click Save Draft to keep an email you have not finished. A draft can be saved without a subject or a message, and keeps its attachments and additional recipients.
When you come back to the page, your drafts are listed above the form. Click Continue to open one, or the bin icon to delete it. A draft is removed from the list once it is sent.
Drafts belong to the event, so every manager of your club sees the same list and can finish a draft that someone else started. If another manager saves a draft while you have it open, your changes are not saved over theirs; you can keep your version as a new draft.
Additional recipients
Click the + beside Additional recipients to include people who are not registered for the event, such as range officers or volunteers. Type an address and press Enter, or paste a list. You can add up to 25 addresses per email.
Participants receive your email because they registered for the event. The people you add here did not, so only add people who have agreed to receive email from you. You are asked to confirm this before the email is sent.
- Additional recipients receive the same email with an unsubscribe link. Anyone who has unsubscribed, or whose address rejects email, is skipped.
- An address that already belongs to a participant is sent one email, not two.
- The status page lists each additional recipient and whether their email was sent.
Create Group
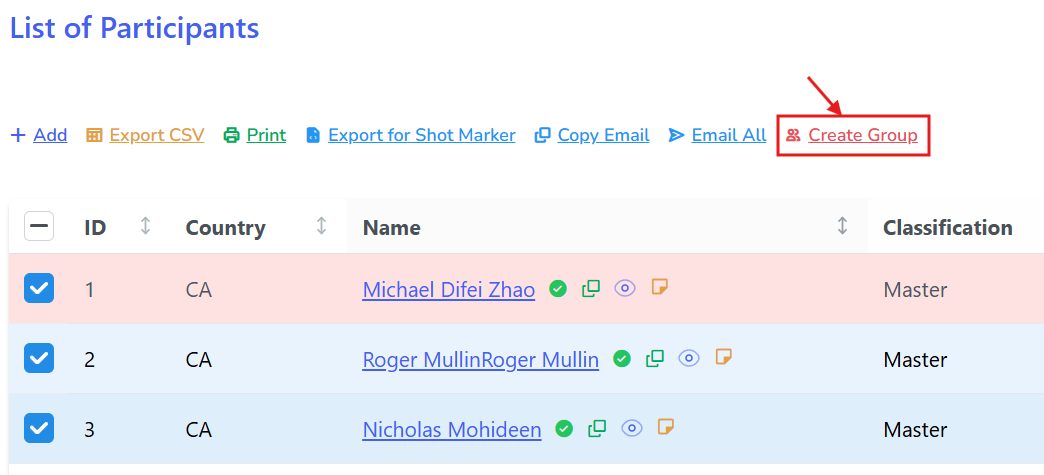 First you need to select the Participants. Then click this button to create a group with the selected participants. This feature is useful for Concurrent Team Matches or organizing participants into specific categories for Prize List (Aggregates).
- Know more about Prize List (Aggregates) in the Prize List Documentation.
- Know more about Categorizing Participants in the Participant Categories Documentation.
Table Columns
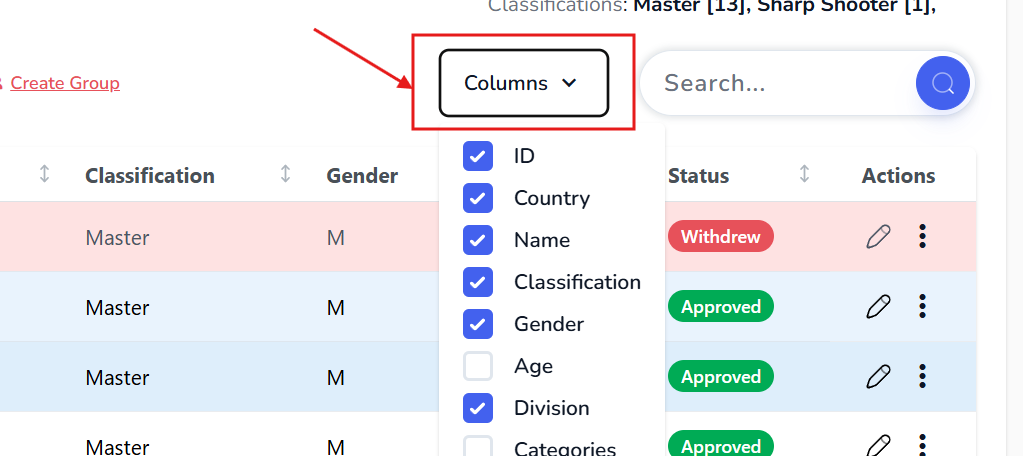
Click this button to customize the columns displayed in the participant list table. You can choose which participant details you want to see, such as name, classification, division, country, etc.
Search Bar
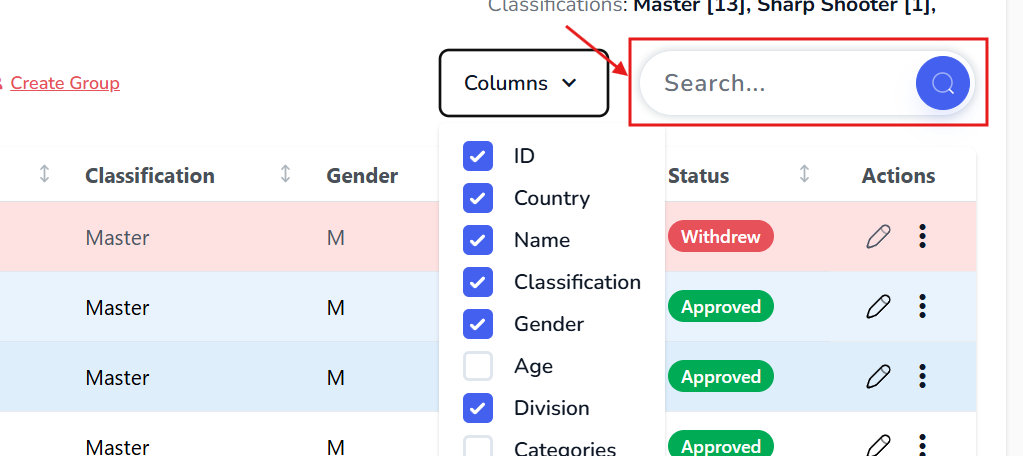
Use the search bar to quickly find a specific participant by name, competitor number, or other details.
- Enter at least 3 characters and press or click the Magnifying Glass icon to search.
User Activity

Click on Participant's name to view their activity, including the events they participated in the past and upcoming events.
Membership Status

If your club is using Team Up Mate for Membership Management, you will see the membership status of each participant in this column. This helps you identify active members and guests for the events.
Copy Email

Click on the copy icon to copy the email address of a specific participant to your clipboard. This is useful for sending individual emails or notifications.
View Entry Form
 Click on the Eye icon to view the entry form submitted by the participant during registration. This allows you to see any additional information provided by the participant.
Participant Notes

Click on the Notes icon to add or view notes about a specific participant. This is useful for keeping track of special requests, preferences, or any other relevant information.
- You can add upto 150 characters in the notes.
- If there is a note added for a participant, the Notes icon will appear filled and blue.
- Hover on an icon to see the note preview.
- To delete a note, open the notes popup and click on the trash icon.
- To modify a note, open the notes popup, edit the text, and click on the save icon.
Manage Participant Status
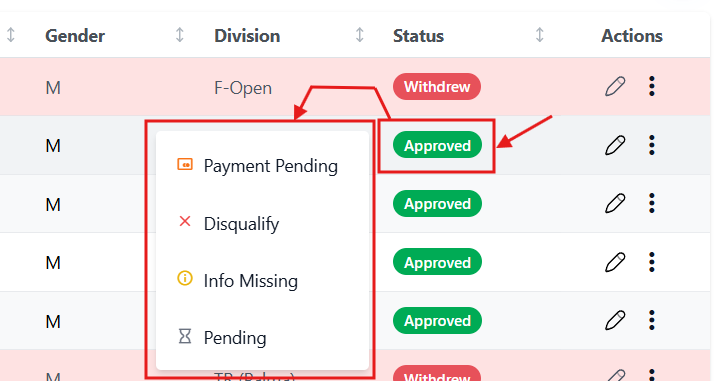 Click on the status of a specific participant. You can change it to following status:
- Pending: Participant is awaiting approval.
- Payment Pending: Mark the participant as payment pending for the event.
- Disqualify: Mark the participant as disqualified from the event.
- Info Missing: Mark the participant as having missing information.
Changing a participant's status will trigger an immedieate email notification to the participant informing them of the status change.
You can't withdraw a participant from this page. Participants needs to withdrawn themselves. Withdraw Participant page.
Edit Participant Details
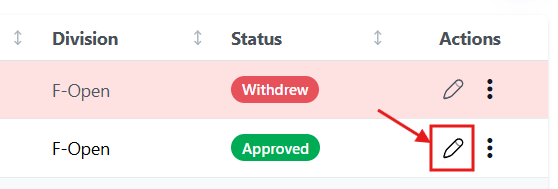
Click on the Pencil icon to modify the details of a specific participant. You can update App Mandatory information such as name for the event, competitor number, age, division, classification, gender, country and category.
Remove Participant
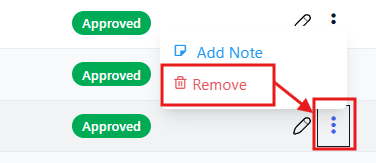
Click on the three dots icon and select Remove Participant to delete a specific participant from the event. A confirmation popup will appear to confirm the removal.
This action cannot be undone.
Support
Need a walkthrough? Reach out to us at support@targetscore.com or schedule a call.